Tuesday, April 27, 2010

Faget da pics, whaddabout da beadstuff??

There are a few blogs now that feature the 6th photo ever posted.. I would like to challenge everyone to post the first beadwork they ever did, if they still have it, and do a critique. What would you keep? What would you change? Mine is below, and I had a lot of fun doing this...now, where ARE my scissors???

Ah, beads, shiney beads, tiny beads, color, shape, FUN! Yes, learning to do offloom beadweaving was a milestone in my life, but the actual first beadwork was, and for a short while still, leaves much to be desired. Yes, if you have magnifiers on, the colors in these are wonderfully interesting. But, from 5 feet back? Not so much. Not at all, really.The technique, while not awful, especially as I remember doing the frogstitch on each of these at least 3 times, left alot of room for improvement, IF you don't count that I had such tight tension as to make the beads pop out of place and that I didn't really know what I was doing, just beading by the seat of my pants.
No matter. These two were the 'first' real beadwork, and I was proud as a new mama of her firstborn child!


Hey, look! It's a beaded bead, no, two beaded beads...well, isn't that just special (snide tone here)?
Both are done over wooden beads, both are so monochromatic as to make me cringe. Nuff said.
I thought they were the best thing since sliced bread when I made them.
Maybe I can use them elsewhere?? Nah. I can do better than that. And that overly tight beading thing- where the beads stick out all over? That has GOT to go!


How about this clasp? Not too shabby, and it shows that I already had a penchant for beaded clasps, rather than all metal. I loved the dragonfly enameled button, which matched the two I added to an emerald cloak stitched up earlier that year, but couldn't figure how else to get it to work. These 15o hex and seedbeads deserve better than this, so it will meet the scissors later.


This feather I still like, and was my first 'creation' using graph paper from an online free source and colored pencils, not to mention lots of erasures. I need to make another and have earrings, after I cut this all apart.


What was I thinking when I did this 'crow' feather, using Czech beads for the spine and delica hex for the feathers? Well, I was thinking it was pretty darn cool...til the thing began curling (check the previous pic), and never really laid straight. Probably that overly tight beading I mentioned earlier, and that I still work to correct.
All in all, it was a learning experience, lots of practice with stitches, and after today, I still have the beads and clasp bits, as well as the blue jay feather to show for it.
How about you? Do you still have some of your first beadwork?
Are you brave enough to share it with us?
Go on...it's a good thing!
As always, click on any pic to make it full size, and have a good laugh on me!

Monday, April 26, 2010

All done- Summer Fruits


Here it is, with a lovely clasp gifted to me from Vicki-Anne of Australia...I am going to have to find these- they are wonderfully easy to put on, and beautiful to boot!

Remember, you can click to make these full size.
Enjoy!

6th photo posted...what do yours look like?


I guess I won't get shot for re-posting this pic of my DH at his birthday party...though it looks better cropped, now.
However, the 6th beadwork photo- let's just say there is nothing nice to say about either the photo, or the doll in it! Out of focus and just not well thought out...that's what happens when you begin learning..
Lynn at http://beadingheartart.blogspot.com/ had this on her blog, so I joined in..why don't you take a look at your 6th, and see just how far you have come!

What Would They HAVE Been?


If they hadn't been such huge PITRs! See my blog on March 4... http://gypsysramblings.blogspot.com/2010/03/wonder-what-these-will-be.html
for an idea of what I thought I might be doing. Let's just say that using the charlottes in the corners was NOT my best idea. They were too small-holed, as well as brittle, to be able to go through them enough to hook them to the rings..broke enough of the charlottes that out came the scissors, and snip-snap, we were ready to create again.
I didn't really like the huge contrast in color, the dark of the satin amethyst next to the jonquil, so it was a good time to dig through the Swar bicones. Lo and behold, there were those lovely fire opals, and they looked really nice with the jonquil yellow. Round and round we went, substituting some 15o Miyuki S/L lime for the charlottes, and folks, we have a winner.
Now, to put them together.
Actually had them, well, a couple three of them, together as part of a bracelet, so I put it against my arm to see how I liked the look. The look was great. The look was awesome- just like warm Spring sunshine and flowers against my skin. The feel, however, was awful! I hadn't realized how scratchy and scritchy Swarovski bicones can feel against the underside of the arm. Didn't want to do an entire bracelet that felt nasty, so they parted company from each other, and just sat and stared at me for the next few days...
So, here is my solution- I love herringbone, love the look of the Swar circles, and the 11o matte lime just fit between herringbone sections, top and bottom of each circle!
Voila!
My eyes AND my arm will be most happy with this combo...now, back to beading!

Saturday, April 24, 2010

It's Good to Be BACK!


It's been a busy week, helping to get the Friends of the Library bookstore ready for the grand opening, driving to the Emerald City to see my pregnant oldest ( and again, just to visit a friend, and wouldntyaknowit- President Obama was coming in, so I just about didn't find a way out!), everything but beading.
It has finally warmed up enough that the plants who live in the front part of our home all Winter, and who have been inside 7 months now, with the early cold weather we had last October, got to go outside. No small chore, as many of them are 8 foot tall, and just small enough around that I can squeeze them through the doorway. Either some of them are going to have to get haircuts ( I hate doing that) or they will have to find somewhere else to live this Winter!
But they are outside, and it is raining, so they are as happy as can be.
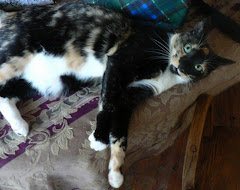
I have moved back into the front part, with all the windows, as have the kitty-poops( you can see Puffin on her new throne) and Al Byrd, the cockatiel, who likes to watch me bead.
Life is good!
Enjoy the pics- click on any to make full size....now, back to beading! And reading some blogs- I have missed you all, as well!

Wednesday, April 14, 2010

OK, couldn't resist- one more time!

The blog police might come after me....two awards in one day?? But the last group was beaders, and as I am divided exactly in half, with my love of both beadweaving and bead embroidery, I am giving the award again, but this time to Bead Embroiderers!
This group of folks has the patience of Job, to stitch tiny beads to fabric and leather, creating pictures that delight the eye! Some of them also create beaded art dolls with this technique. Whatever they choose to embroider, it is definitely worth the time to follow the links to each of their blogs, and enjoy the fruits of their labor in photos..And no, it is not any easier picking just 6 of these!
Without further ado, my 6, and in no particular order (as well as the link leading to a post at their blog about Bead Embroidery that I particularly loved;
1)Kaite http://kaiteyarngarden.blogspot.com/2010/03/march-bjp-in-autumn-colours.html

And the Awards Go To...

Nicole of the wonderfully entertaining and informative (not to mention beady bit offerings!) blog, Beadwright, http://beadwright.blogspot.com/ awarded 6 people this sweet pat on the back. I am doing the same, and asking these 6 to pass the award onto 6 folks they feel are truly nice!
Not an easy task, but having to choose from folks that have active blogs helps somewhat. Therefore, I pass this award on to (in no particular order!!!);
1) Olga http://lovingbead.blogspot.com/
2) Stephanie http://stefaniessammelsurium.blogspot.com/
3) Jaycee (Juanita) http://jayceepatterns.blogspot.com/
4) Ralonda http://beaded2bless.blogspot.com/
5) Victoria http://artntheheart.blogspot.com/
6) Beth http://bouncingwolfcreations.blogspot.com/

Tuesday, April 13, 2010

Scottish Wood


I love these 15o gold matte beads from beadlady.biz - they change looks with everything I use them in. When I first bought them, I wondered where I was going to use them, but they really add that bit of 'unusual'. In this netted piece, they bring a look of tiny wooden beads, especially as I used a single hole wooden button as part of the clasp. The pattern reminded me of a Tartan, therefore the name.


The bugles are Toho # 3, and the seed beads are lovely Tohos, that were a gift from my creative beader/metalsmith/chef/polyclay expert, Harry Solly!


click on any photo to make it full-size.

Spring Cleaning

No, not the kind that involves rags, vinegar and lots of hot water, but that which has to do with going through old stuff, seeing what is still useful, and what would be better off somewhere else.
It all began with trying to find a pattern I knew I had just seen, somewhere in the paper stacks ( all of them neat, but unorganized) or in the books of patterns that had been copied off free sites on the internet, but couldn't find. As it is a pattern we are doing at the retreat in a month, it behooved me to NOT wait until the last minute to find it, not with everything else going on; first grandchild due near that time, getting ready for a show 3 weeks afterward, etc.
No time like the present to just dive on in, and get all that stuff sorted and put into some semblance of order!
Spring, Glorious Spring always brings a feeling of newness to my life, so it was truly a pleasure to get out the different binders, stacks of papers, and dig through drawers for the odd pattern that had slipped into them. Taking a good look at each, deciding if it was really anything I wanted to do, learn, or even use for inspiration, they went into either the correct pile ( bracelets, necklaces, 3-D, instructional, earrings, wire), a different pile to give away to new beaders, still another pile to go to the retreat for folks to dig through- stuff I thought I would like, but on second look, was never going to make, and the last; the pile of junk- stuff that faded beyond recognition or was generally useless, partial instructions, etc. The latter I cut into scrap paper to take to the Friends of the Library bookstore. Had a tiny stack left over that was printed on both sides, to start the Spring cleanup fire with. WOOO-HOOOOO!
I now have 4 empty binders, and can find any pattern or instruction easily. I even took the time to stuff pattern, even those with multiple pages, into those plastic holders, and make sure that within each folder, patterns using similar stitches are next to each other.
No more will I spend hours looking for something!
Now I can spend hours scanning these lovelies into the computer, enhancing the ones that are faded (yes, inkjet ink fades, even kept in the dark!), and putting them onto thumbdrives in even easier-to-find (and share) formats.
Ahhh, Spring!

Sunday, April 11, 2010

Beach Party


I have seen several version of this, even one in the bead magazines, but those usually involve Swarovski squares. I didn't want to do it like those versions for a couple of reasons; cost of the Swar bits, I am too hard on glass items like those to wear them in bracelets, didn't like how the beadwork holding the bits together was attached at the base- they looked awkward and not as professional as they can look, when stitched as a loop.
I LOVE Paua shell, and picked up the donut at Walmart several years back. It languished in my hugeish tacklebox of gemstones and shells, jumping out at me while I was looking for something to end the bracelet, which is mostly MOP dyed, then an AB finish added to the MOP. VOILA! The perfect loop for a toggle, and its size keeps it on top of my wrist, making it the focal as well.
Comfy, a bit boring to do all the strips, but you can listen to stuff on Hulu.com while you are making them, and if I do say so myself, striking!
I don't even care if this one sells. And I have got to find more of these lovely Paua shell donuts!

Friday, April 9, 2010

March Snows Bring April Flowers?


We had a dry month, except for the early snows, but look what has popped up already!
Click on any photo to make it full size.

Thursday, April 8, 2010

A candle for Nicole's (Beadwright) brother

http://www.gratefulness.org/candles/message.cfm?l=eng&cid=10552660

Please say a prayer, send a happy thought, peace, or whatever you are moved to do, in this difficult time. Her blog is http://beadwright@blogspot.com
Friends are Blessings we ignore at our loss...

Tuesday, April 6, 2010

WT Bracelet comes home!!


I just adore it- created by Penny H of UT, using mostly beads I sent to her, that I just could not find myself inspired by. Obviously, she and her Muse had a much better time. This is def one of my fav bracelets, having all the elements I love; texture, slinkiness, color and BLING! AND the little amber AB flat round pressed glass spin, so it has fidgetiness, too....LOL- is that a word??Is NOW!
Click on any pic to make it full size.
Thank you so much, Penny!

Monday, April 5, 2010

Nicole's blog Birthday Giveaway

Go check this out- it is very cool, and you will find her blog and etsy site most intriguing!
http://beadwright.blogspot.com/
Though I have to say I think her 'rabbit' for sale in the Etsy shop looks like an anteater!! A pretty anteater!

Playing Around With Miyuki Drops


Here is the result. It is fast, fun to do ( once the pattern sticks in your head ), and could have lots of color changes, including making the center V or Z a different color. Don't pull too tight, especially if you are using Fireline, because it will round itself, instead of laying flat. It is also a nice look and feel, but not if you have flat portions in the beginning LOL!
Have fun! Left click to open pics to full size, right click to 'save as'.
Happy Spring and Happy Beading!

Saturday, April 3, 2010

Penny's WT? Swap items


These are Penny's bracelets, created for the WT? Swap at Beaddreamz Yahoogroup- the top one if Turkish Crochet, and the bottom is a caterpillar form. I am happy she likes them both!

Friday, April 2, 2010

Simple net instructions


4 yds of thread should finish a bracelet 6-8" long- use a thread that will go through your beads at least 3 times. If you prefer to add thread, weaving in the old tail and weaving in a new is preferable to having a knot, as there are little opportunities to hide a knot in this bracelet. Weaving also means using a thread thin enough to support this, and the addition of embellishment later, as you will reweave many of the original thread paths to do this embellishment.
Place stop bead, leaving tail long enough for clasp end of your choice-8 inches is usuall enough.
Add 20 beads to thread, slide to clasp bead. If you wish the picot to be a different color or size of bead, add 17 beads, then 3 beads of the different color/style.
Take thread BACK through 4th bead nearest end, creating a 3 bead picot.
*Pick up 7 beads, and go through the 8th bead. Repeat.
Either pick up 7 beads and go BACK through 4th bead of last beads added to create picot
OR
pick up 4 beads, add 3 beads of different color/style, then go BACK through 4th bead just added to create picot.*
Repeat from * to * til bracelet is as long as you wish, minus clasp length. Netting stretches, so be sure to pull it a bit when testing for length.
This can be widened or made narrower by adding or subtracting multiples of 7 to the original line of 20 beads.
Add buttons or other clasp end before adding top embellishment. If you wish, this is a good place to make peyote circles for the loop ends of a self-clasp, as shown in the above photos.
Add pearls or other beads to crossover points in the netting by working your way back and forth to the beginning, going through the crossover bead, adding pearl and 15o bead, then back through pearl and through crossover bead in same direction you went the first time, pulling tight. continue to next crossover point. When you reach the last crossover and add your pearl, you will have to go around the outside beads and picot to get to the next crossover point. This is why you want your thread size to be able to go through beads multiple times.
Add your other clasp end, or your buttons, etc if you used a self-toggle of beads on the other end.
Wear your bracelet with pride!
You may click on any pic to make it full size, and right click to save it to your computer for future reference. Please feel free to share these insructions in any manner.