Showing posts with label ornament. Show all posts

Sunday, December 19, 2010

It's not only official, but it shows!


OK, I admit it....I am a BEAD SLUT! Can't leave them alone....walk the aisles in WallyWorld, sneering at most of their beady offerings but still fondling, even as I leave the area. Can be found poking about in the 'mens' section, looking for yet more storage that works, is easy to transport, and that I can actually SEE my beads without opening.
And the kicker? I, sob, couldn't leave them alone long enough to finish one measly little scarf! Told myself it was because I wanted fatter knitting needles(those 6s were going to take the rest of my life, nevermind how nice the scarf was turning out!). So, bought the 15s, but did I knit?? You MUST be kidding....I heard these cute little glass ornaments, about an inch wide calling out to me.....'we want beads',' pick us-pick us', and 'you know you want to do it'!
So, not being able to resist either them OR the beads, I took a few hours (netting always takes longer than you think, on the first project of a different size-for me, anyhow) and covered them with netting after gluing the tops securely in place with Gluesmith Glue. Then shoved 3mm and 4mm Czech FP rounds into any spaces they would fit, filled in others with more netting, and VOILA! Wore one to lunch with friends, and they liked it!
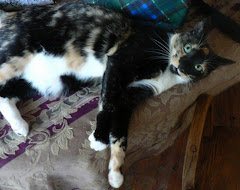
Callie Catt tested them for sturdiness by pushing them off my beading table 3 foot to the hard wooden floor. They bounced nicely!
I wish I had bought more- they came 12 to a plastic box for a dollar....
Back to the scarf...happy beading, everyone!

Sunday, December 27, 2009

All done~


My DH thinks the color scheme is right out of
Fredericks of Hollywood, so the name 'Frederick's Lantern.

Added an extra row of dangles and peyoted the top V
of the inner ones, because I do not like the wonky look
of single delica lines.Also added a few dangles to the top
sections for more bling...gotta have bling!

Friday, December 25, 2009

Lantern Pagoda ornament


This was supposed to be the Paula Adam's pattern
featured in the Dec 06 Bead and Button magazine,
but I got to wondering what would happen if I
changed out the side and added some crystal
roundelles in two sizes....well, what happens is;
it gets longer, and I am running out of the main
bead color. Plus, what was I thinking with all that
purple and no other colors to warm it up. Dk Green
Iris doesn't do it and neither does the crystal AB
for the 'windows'.

Hate the bottom- and there are too many passes
for me to be able to get it to do what I want...I see
the trusty scissors coming and redoing. Yep, I am
a perfectionist...but this is the perfect medium for it,
only losing a bit of Time and thread, and I am going
to use 4# Fireline, so that I have more room to get
thread inside the delicas!
You can also purchase Paula's pattern at;
all her other wonderful patterns as she would
wish them done.

It's Ornament time!


I finished this one, called Ole' because it looks like a flamenco
dancer with hat. I started out doing just netting on a teardrop
ornament, and kept adding...well, y'all know that is what I do! LOL!

Friday, December 18, 2009

Angels, Angels, Everywhere

> > > See free tutorial at:http://www.beadjewe%20lrymaking.%20com/2009/%20project/december%20_kid.html
Christine (angelbeadflower) has awesome tutorials, many of them using RAW
stitch at her free site. These angels were an adaptation, as I didn't have
the exact beads she required, nor the longer headpins, at least until my DH
stopped by after work and picked some up for me!
This angel was made using
the tall 1" bugles, and the method outlined below, using thread
instead of bugles to hold the bits together. Crystal briolettes
are her wings here.
The angel on
the left was done to Christine's instructions, using a headpin
to hold all together, but I turned the hanging loop at top to
make it her halo.
The angel on the right;used headpin to hold together, her
halo is a SS roundell, crystal briolettes for her wings.
This is a headpin
attached angle, with pressed glass wings and a SS beadcap for
her halo.
This was my first angel
and I had to adapt the pattern a bit- no long headpins, not
enough 3mm bicones, and no 12o seed beads! I used 3mm
round crystals in place of the 12o, with doubled Fireline, and
4mm bicones between the bugles, with SL seed beads
between bugles and crystals. After I got the skirt finished
to her instructions, I went back with the thread and added
more 11o SL see beads between the others, and between the
3mm round crystals, to strengthen it up and fill in the thread
gaps...I am funny about thread showing! LOL!I used a 10mm
round crystal at the base, with an 11o seed bead to hold it in
place- made a surgeon's knot in the Fireline, then used thread
burner to create a little bunch next to the knot, so it would
not pull out of the 11o, and would be at the bottom of all. I
then went up through the skirt, add the arms/wings combo
(substituted two briolettes for wings), and took thread
between the 3mm rounds I substituted for the 'hands',
through the 11o SL in the skirt, back over between the
3mm hands and down through the skirt to the base 11o,
through it and back up through the 10mm round, skirt
and arms/wings.I then added a large glass heat, point up,
and went through it, poking the top of it through the
arms/wings, added a 6mm round for the head, a SS roundelle
for the halo and a largeish Czech seed bead to hold everything
together at the top- then back down through the halo, head,
and heart. Then I added 3 110 SL seed beads, took the thread
through the 11o SL seed bead at top of skirt, back up the
3 SL 11o beads, heart, head and halo, pulling tight as I went
along. Her head then dropped down like she was praying,
and I like the look. I went out through the seed bead holding
the halo on, then added some more 11o seed beads to make a
circle to hold her onto the tree.
I have to say that both methods; headpin and sewn-together,
work much better for me when I used thread and 2 seed beads
to hold the skirt and arms/wings together.
I really enjoyed making these, thank you Christine! I hope my
Friends and Family like getting them for their gifts!

Monday, November 30, 2009

A bit of Holiday Cheer


Inspired by an online pattern from Bead & Button Magazine, that cost more than I was willing to spend! Mine uses 8o Matsuno beads for the triangles, has rivolis added on top, and is open at the base, so it can be used on another glass ball, if the first breaks. Click on any pic to open.